Showing posts with label art. Show all posts

1.04.2013

Circular Perpetual Calendar

Kids Hebrew Calendar
We made this little project yesterday and it was fun. The girls haven't quite finished theirs, and it's admittedly much too difficult for Leviah (age 4) who really enjoyed the cutting out portion. But, I really like what we ended up with and I think the visual relationship really helps them see how the Gregorian (modern calendar) and the Hebrew calendar and the seasons all interact.
round calendar
The only small change I still want to make is to mount it to something more solid than just the paper, potentially with a pointer like this one I found via pinterest.
kids calendar
It's a good time of year to talk about calendars and time passing, etc.
lunar calendar
We used three different plates as templates for the circles, and brad to hold the three together. I love rotating projects like these. I'm hoping to make a few life cycle ones--perhaps in the spring when so many life cycles are just beginning.

12.26.2012

An Ode to the Blackboard

School.
Can I simply say that a school without a black board just isn't a school?

That may be an exaggeration, but sharing ideas with my 'students' has much simpler with a piece of chalk and a large empty black board. Visually demonstrating my instructions, writing out math problems, jotting down bits of copy work, drawing my silly drawings to show that perfection doesn't mean flawless...
Yes. 'Perfect isn't always flawless'. I'm going to need a wall-hanging with that.

I just wanted to make sure you all knew, in case you don't have one. I'm making a pinterest board for chalkboard use--if you'd like to share, let me know. I'll send you an invitation.

4.08.2011

Nomes Gnomes. Handmade Bead People


 We bought some polymer clay and I had a plan to make beads. I've never done it before and it was probably wrong of me to assume it'd be as easy as I'd thought. Well, it wasn't hard, but as with most crafts, it led us in its own direction...

First we rolled out our four colors in relatively equal strands, smooshed them and rolled the big roll out to be round.
We started out making cut/sliced beads, but we got a little bored and so we started rolling the slices to make rounder beads, snakey ones, twirly, twisty, etc.
Then, Naomi rolled one and she determined it to be a gnome. Well, that started us on a gnome making frenzy...and, how could we not. Gnomes are cute enough, but when they're tiny gnomes?!

They've been baked and now we've got several .5inch Gnome men and women. 
We used them to make necklaces this morning.
One for Leviah
One for Naomi
and one for Mama.

A simple project that can be worn! (the additional beads were from a Haba bracelet from a thrift store that's been stretched out and laying around for some time...waste not, want not! toadstools and clovers fit the gnome theme perfectly)

don't forget to scroll down just a bit and comment for a chance to win some sweet garden goodness before you go! 

4.07.2011

Making Art Because

So, I took the last session of an 8 week pottery course I took at the local Cultural arts center. I highly recommend it, making pots that is. I've always known about my love of clay manipulation, but it's been over 8 years since I last did it and what a reminder I had...turns out (no pun intended) I love it. Also, note that it's NOTHING like riding a bike, particularly throwing, it is a start-back-at-the-beginning type of thing.

But, there are just so many translate-able parts of pottery--things that represent themselves in life; balance, patience, embracing the unknown, focus, eliminating distraction, participating in the process, following the clay and letting go of the preconceived notions...

I'll share some pics of more completed items, maybe next week. I'll have to go back to the studio to tie up some loose ends.

I've also been playing a lot with this Instagram tool, which is pretty sweet. It makes you feel like you have 12 cameras in one. If you have an iPod or iPhone, it's free and you can follow friends--of course. It's a sweet surprise to see an unexpected picture of a friend on my phone, just for fun. Here's another with instagram and one that just has beautiful filtered light--the room was amazing.


7.20.2010

Hands on Color Wheel and Stuffed Zucchini

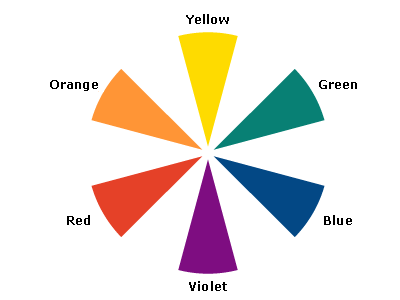
Inspired by this post to retry making playdough (we've done it before but with less than perfect consistency), I  had a revelation. When it came time to mix colors I thought it'd be a good opportunity to present Naomi with the Color Wheel.
So, I divided the dough into 6 pieces & made little divets in each. Using blue in 3, yellow in 3 and red in 3 overlapping between the colors (so, red & blue in one, yellow & blue in one & red & yellow in one). Then we kneaded them together. I asked Naomi ahead of time what she thought would happen, then as she mixed she realized what colors were being made--she loved it! Hands on learning...
Last night for dinner I made the Turkish Style Stuffed Zucchini for my Moosewood Challenge.
It was actually quite good. I substituted parmesean for the swiss it called for, but other than that--great. Paired with fresh tomato salad it was a great summer dinner. Naomi said she could eat it every day of the week & Leviah did this:

7.14.2010

So. Busy.

Oh me, oh my.

We've been keeping busy, but it seems I have nothing to report! For the blog sake, I always feel like there needs to be SOME progress with little exultation to simply surviving another day--sense of humor intact. That's what we're doing. So, I'll just share a few pictures.
can't seem to wash this heat away...even at the spray ground 
what Naomi's blog would look like. 

though not the greatest garden year, there are still tomatoes to be harvested.
'farm' play.
storm watching.
That about brings you up to date.

Note: Naomi's in art camp with a local couple who is doing a tremendous job. I'll share pictures of all her creations (so as not to forget). I'm really excited about HER excitement. She is re-pumped about art & creating. If you're in the area & looking for an art camp next summer--don't miss this one. Can't say enough good...

5.06.2010

How to make a Tie Dyed Butterfly Mobile

Last week at the Charlotte Mason homeschool group we attend I saw the preschoolers making these simple butterflies to go along with what the big kids were studying.

Anyway, I couldn't help but want to do it with Naomi, and I've been wanting to make a mobile with her, so here we are.

It's a simple project for little hands & requires minimal supplies.

  • Markers
  • Coffee Filters
  • Pipe Cleaners
  • Spray Bottle with water (splashing with your fingers might work, too).
  • Fishing Line
  • Paper Plate
  • fishing line
  • scissors


First, flatten your coffee filter & color away. Patterns, randomness--whichever. (color on the outermost part is more important as the middle section will get scrunched). 
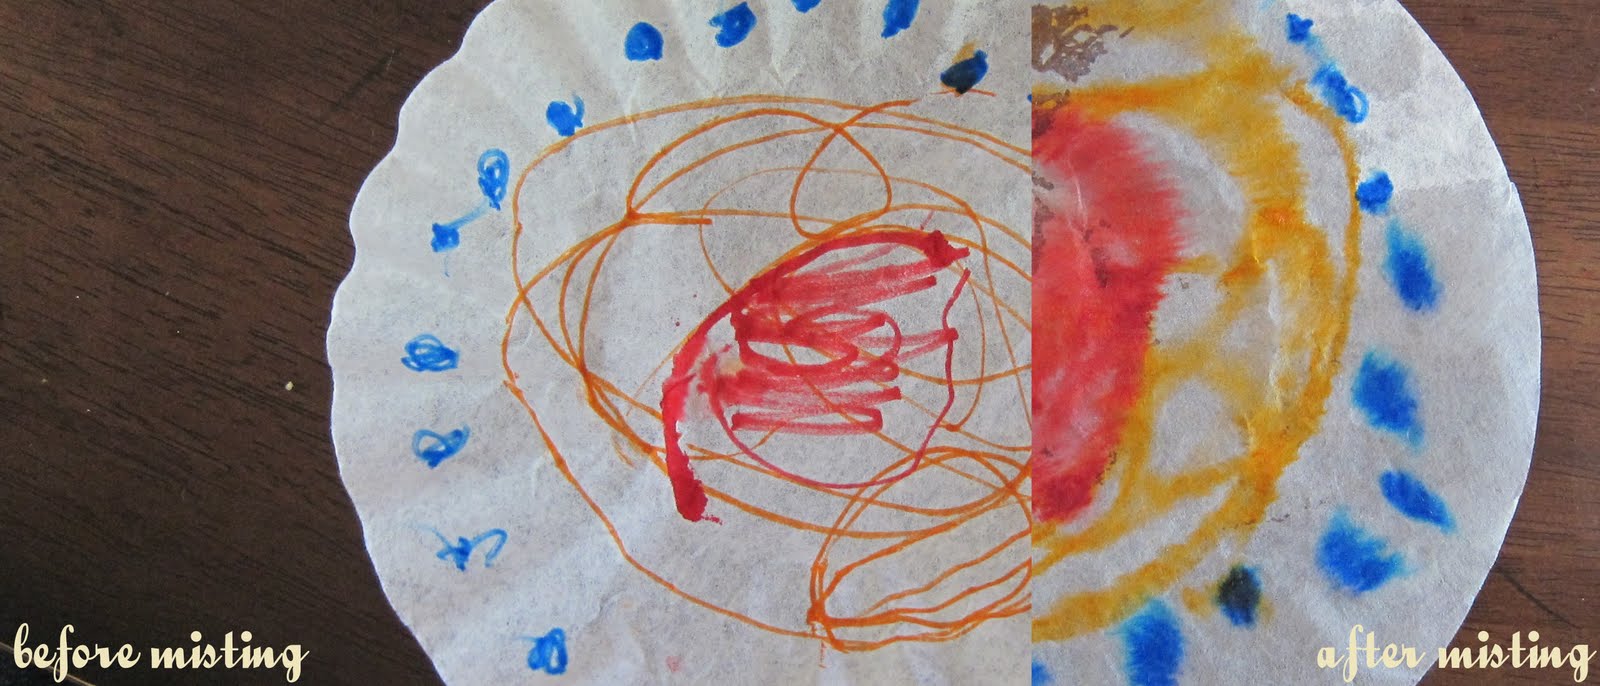
I had Naomi use 2 colors on a couple so she could see what happened when they blended after spraying--great way to teach color theory...(i.e. yellow+blue=green)
So, coloring done, spritz with a bit of water--not too much.

Allow ample time for drying & then scrunch at the middle & twist a pipe cleaner around leaving long ends as Antennae.

You could hang them any number of ways, but since we were already using filters I thought a paper plate would be just the thing & coloring it sky blue also seemed appropriate. Just string a line for each butterfly through the top downward & 1 through the middle upwards as a way to hang it from the ceiling or a tree. A square of cardboard, or like we used, a small section of pipe cleaner tied around the fishing line before it's pulled through the holes in the paper plate keep the line from falling through.

Tie each strung piece of fishing line, hang & wa-lah!
bright & cheerful!

3.17.2010

Recycled Paper Weaving

::A Simple Afternoon Project:
So you can't keep EVERY painting, coloring page & scrap doodle, but you can re-use some of them! We're all about printing on the back of old copies, painting on trash-mail, recycling unwanted solicitations & today we did just that.
recycled paper weaving
fold a piece of construction paper in half & cut straight lines from the folded edge leaving 1 inch uncut at the top.
waldorf homeschool
cut up strips of scrap paintings, etc. in all different widths.
waldorf education
all materials required.
paper craft
weaving with childrenhow to paper weave
Unfold the construction paper & weave, weave, weave! (we even through in some strands of yarn for fun)

oak meadow curriculum
the finished products are great! Laminated they'd make great place-mats...

A quick & easy project for little fingers (& it was much fun for me too).

5.04.2009

a morning "out"

I had this thought about doing "school" work with Naomi. She hates sitting still & despises following my direction. So, I thought maybe I'd encourage distractions & hope she'd follow my lead instead...so, we looked & drew. No fancy paints, or sparkles--just pencil & paper & a gentle breeze. (oh, and refreshments of course: dad's homemade pretzels and Emergen C)


grass

shovel, line and grass

"nap"