Showing posts with label kid craft. Show all posts

8.05.2010

Vintage Swap

Things are much less grim feeling. Refocused...
Yesterday, in particular, was a good day. We had some extra kids over for some extra craziness and we had a really fun time crafting paper bag puppets. What a simple & fun craft. what can't you use to add a little character? Plus, then the girls performed a silly little puppet show from behind the couch. There was an awful lot of giggling involved!
And then I got a package, which is always exciting, but it's even better when you don't know what's inside and opening it is like meeting a new friend. I used to send letters and packages to friends from camp all the time and it was SO exciting to check the mail & read a little about their lives. There's just something so personal about a packages that's obviously been handled with care. I hope my swap partner is as happy with her goodies as I am. Take a look!
doll cloths, cute hankies, play colander, adorable blue apron, carrot art, and a cookbook with lots of vintage-style goodies. THANKS JENNIFER!
the carrots have already settled into their new home comfortably. Yay for the vintage swap!

6.03.2010

How to make a Heat Buster

whew. it's a hot one & only getting hotter. humid mainly, nothing dry about it, in fact, from one minute to the next we're not real sure if there will be enough moisture to actually create rain.
But, after spending far too much on store bought (but delicious) chocolate covered bananas last year, we made our own. SO simple & I really want to emphasize the 'so'.

Everyone seemed pleased, except for Naomi who decided she doesn't really like chocolate. We'll see if that lasts through tomorrow.

I broke off the pointy end of some skewers/shish ka bob thingies & stuck one in a half of a banana (4 bananas=8pops). We let those freeze for 3+hours. I melted some dark chocolate via the warming eye on our stove (a double boiler would work) & dipped the frozen nanas in & spread the chocolate around semi-evenly. Stuck them back in to freeze up again & wah-lah. delicious.

&, if you're looking for a meal that is terrific for a summer night here's one we stumbled on:
Noodles (we had a bag of flat spinach noodles that worked great, but spirals, bowties, etc. would be great)
Chopped Spinach (a handful or 2 from the garden)
Diced Tomatoes (fresh is best & local are easy to come by about now)
Parmesan (to your own tastes, about 1/2 cup is what we used)
Grilled Chicken (as much or as little as you like, we grilled in Amy's Limeade Marinade--yum.)
Olive Oil (lots. like 1/2-1cup).
Salt (to taste).

Boil noodles, add olive oil, salt & parm. Throw in the rest, toss it around & devour. It's great warm or chilled.

Happy summer time!

5.06.2010

How to make a Tie Dyed Butterfly Mobile

Last week at the Charlotte Mason homeschool group we attend I saw the preschoolers making these simple butterflies to go along with what the big kids were studying.

Anyway, I couldn't help but want to do it with Naomi, and I've been wanting to make a mobile with her, so here we are.

It's a simple project for little hands & requires minimal supplies.

  • Markers
  • Coffee Filters
  • Pipe Cleaners
  • Spray Bottle with water (splashing with your fingers might work, too).
  • Fishing Line
  • Paper Plate
  • fishing line
  • scissors


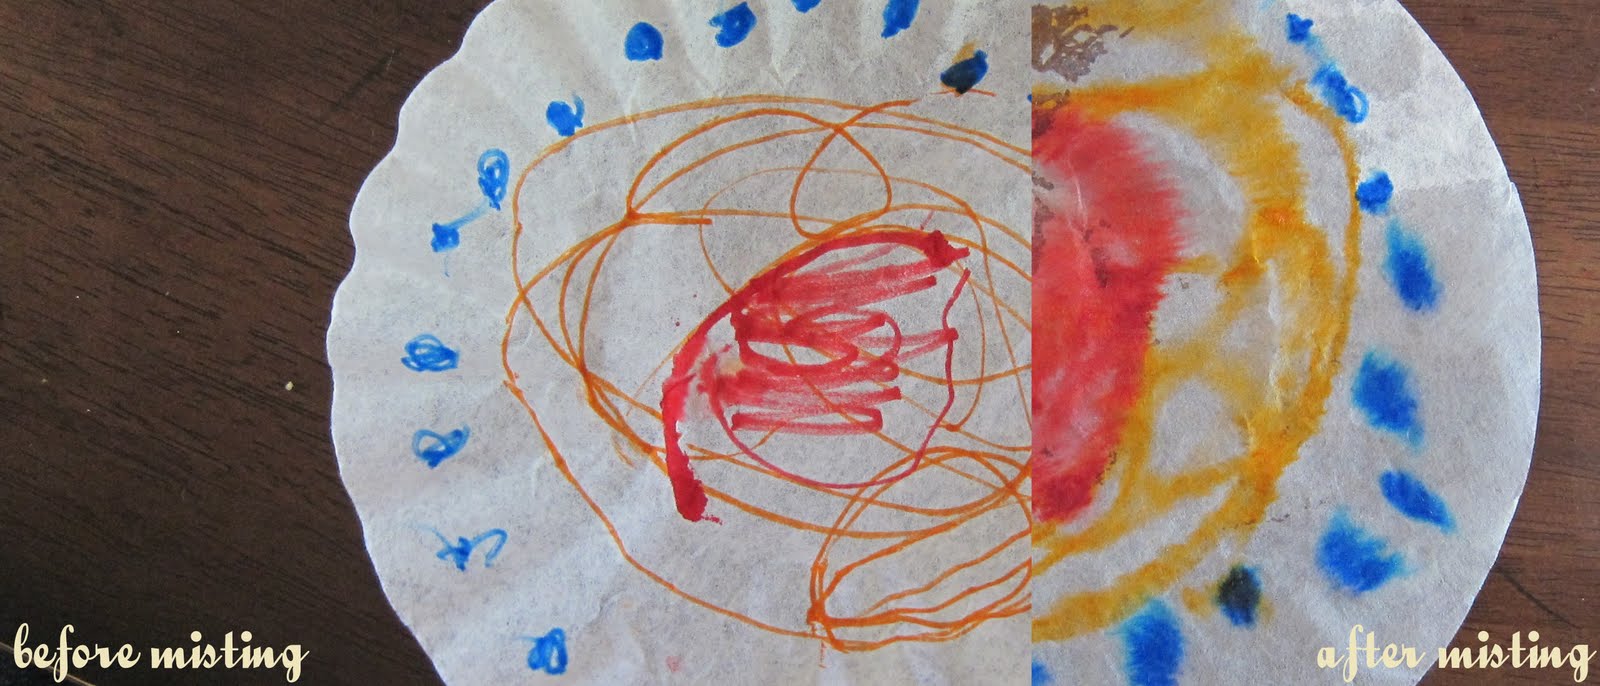
First, flatten your coffee filter & color away. Patterns, randomness--whichever. (color on the outermost part is more important as the middle section will get scrunched). 
I had Naomi use 2 colors on a couple so she could see what happened when they blended after spraying--great way to teach color theory...(i.e. yellow+blue=green)
So, coloring done, spritz with a bit of water--not too much.

Allow ample time for drying & then scrunch at the middle & twist a pipe cleaner around leaving long ends as Antennae.

You could hang them any number of ways, but since we were already using filters I thought a paper plate would be just the thing & coloring it sky blue also seemed appropriate. Just string a line for each butterfly through the top downward & 1 through the middle upwards as a way to hang it from the ceiling or a tree. A square of cardboard, or like we used, a small section of pipe cleaner tied around the fishing line before it's pulled through the holes in the paper plate keep the line from falling through.

Tie each strung piece of fishing line, hang & wa-lah!
bright & cheerful!

4.27.2010

Making a Spinning Snake Spiral...

oak meadow homeschool
Just wanted to share a fun & easy letter S project for little hands from our curriculum. We had a great time & can't wait for little sister to wake up so we can hang it in their room.
the letter s snakesnake craft
Naomi chose the type of snake (diamond back rattler), although it took on many characteristics & turned into a great way to practice pattern mimicking, which Naomi tends to dislike.
recycled craft

To make your own simply cut a spiral out of an old box & decorate! Add a string to the center (which you can make the head or the tail).

4.07.2010

A Fortress out of a Sandbox...

We turned the sandbox into a cathedral fort this weekend. It works great & was simple--a $4 project.

Last birthday we dyed a bunch of play silks & through the winter used them in the girls' room, but outside they just seem to catch the light more whimsically. Plus, the breeze makes them 3 dimensional. Of course, we want a playstand, but this is a quick & cheap fix for us penny pinchers.

Anyway, here are the quick steps it took to make our swing set the perfect place to build a fortress with a sanctuary feel.

1. Paint some wooden clothes pins (available at the dollar tree). I thought the slide on kind would be easier for little hands & water colors worked great--an easy project for kiddos, too.

2. Screw in some eye-screws. This can be difficult to start, I took advantage of some cracks in the wood to get the screws turning. Pre-drilling holes would make for easy turning.
3. String some twine or laundry line through the eyes of the screws, pull taught & tie off.

4. Hang away!

I think we'll add line to the bottom as well eventually--it might 'fortify' the walls just a little more. This system is a great way to give the kiddos some privacy, a way to build forts easily, & also keeps the sandbox shady & cool. We also got thicker line to make the silks stay in place even better. Leviah is insane with them--& waddles around with them over her head like E.T. on Halloween. They make great dress up clothes & dancing accessories...

Don't you love playsilks?

3.30.2010

Leaving Egypt...

'upcycled' Moses (more great Passover & other crafts here)
Leaven Free Desserts
Cleaning up
Headless Felt People from this pattern.

It's Passover this week & we came to Drew's parents for the celebration. We'll be here until Thursday & are playing with felt, going to playgrounds & staying completely entertained while we're in town (Charlotte). What a metropolis! It's fun to see the city life, but our mid-sized Greensboro is the perfect fit for us city-wise.

& we've experienced what feels like a Passover miracle of our own. I will share more with that should it come to fruition, but key phrase: 'Promised Land'.

3.17.2010

Recycled Paper Weaving

::A Simple Afternoon Project:
So you can't keep EVERY painting, coloring page & scrap doodle, but you can re-use some of them! We're all about printing on the back of old copies, painting on trash-mail, recycling unwanted solicitations & today we did just that.
recycled paper weaving
fold a piece of construction paper in half & cut straight lines from the folded edge leaving 1 inch uncut at the top.
waldorf homeschool
cut up strips of scrap paintings, etc. in all different widths.
waldorf education
all materials required.
paper craft
weaving with childrenhow to paper weave
Unfold the construction paper & weave, weave, weave! (we even through in some strands of yarn for fun)

oak meadow curriculum
the finished products are great! Laminated they'd make great place-mats...

A quick & easy project for little fingers (& it was much fun for me too).